Repair and maintenance procedures for Briggs & Stratton engines are detailed in this manual‚ assisting technicians and service personnel.
These engines power diverse equipment‚ notably lawn mowers‚ requiring annual upkeep and occasional repair‚ as outlined in service engine sales manual MS-6255.
Illustrated manuals and PDF resources are available for both current and out-of-production engines‚ aiding in effective troubleshooting and component replacement.
What is a Briggs & Stratton Motor?
Briggs & Stratton motors are renowned for their widespread use in outdoor power equipment‚ becoming a staple in lawnmowers‚ generators‚ and various other applications. These engines‚ detailed in service manuals‚ are typically small‚ air-cooled‚ single-cylinder engines‚ celebrated for their reliability and relatively simple design.
The company’s engines power a vast array of equipment‚ necessitating readily available repair resources like illustrated parts lists and PDF manuals. Understanding their construction is crucial for effective maintenance and troubleshooting‚ as highlighted in manual MS-6255. They are a dominant force in the small engine market.
Importance of a Repair Manual
A Briggs & Stratton repair manual is absolutely essential for anyone undertaking engine maintenance or repair; These manuals provide detailed instructions‚ diagrams‚ and parts lists crucial for accurate diagnosis and effective solutions. They assist both experienced technicians and DIY enthusiasts in safely and correctly addressing engine issues.
Access to a manual‚ whether in physical or PDF format‚ ensures proper procedures are followed‚ preventing further damage. Utilizing resources like service engine sales manual MS-6255 guarantees informed repair‚ extending the engine’s lifespan and optimizing performance.

Understanding Briggs & Stratton Engine Components
Briggs & Stratton engines comprise vital systems – engine block‚ carburetor‚ ignition‚ and fuel – each requiring specific maintenance and repair knowledge‚ detailed in manuals.
Engine Block and Internal Parts
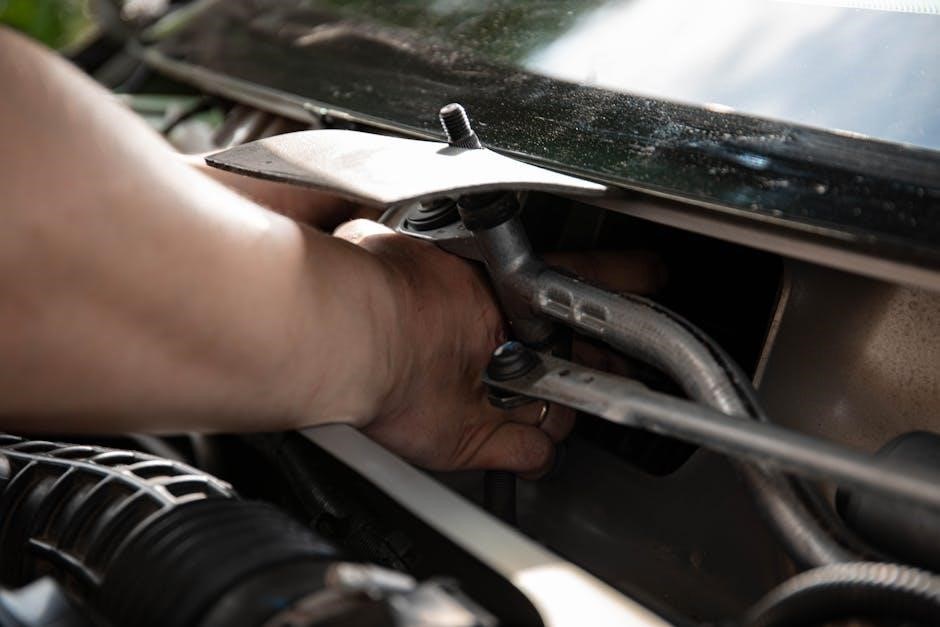
The engine block forms the foundational structure‚ housing critical internal components like the crankshaft‚ piston‚ connecting rod‚ and valves. Repair manuals emphasize inspecting these parts for wear‚ damage‚ or scoring during engine teardowns.
Understanding the precise arrangement and function of each component is crucial for successful repair. Manuals provide detailed exploded views and parts lists‚ aiding in proper reassembly. Regular maintenance‚ as outlined in service guides‚ helps prevent internal failures. Proper lubrication and cooling are paramount for longevity‚ and manuals detail recommended oil types and cooling system checks.
Carburetor System
The carburetor meticulously mixes air and fuel for optimal combustion‚ and repair manuals dedicate significant attention to its maintenance and troubleshooting. Common issues include clogged jets‚ a dirty float bowl‚ or a malfunctioning choke.
Manuals provide step-by-step instructions for disassembly‚ cleaning‚ and reassembly‚ often including diagrams for proper component placement. Adjusting the carburetor is vital for smooth engine operation‚ and service guides detail specific adjustment procedures. Understanding the fuel system’s interaction with the carburetor is key‚ ensuring proper fuel delivery and efficient engine performance.
Ignition System
The ignition system initiates combustion‚ and Briggs & Stratton repair manuals emphasize its critical role in engine function. Key components include the ignition coil‚ flywheel magnets‚ and spark plug. Manuals detail testing procedures for each element‚ identifying weak or failing parts.
Replacing the ignition coil is a common repair‚ with instructions guiding technicians through the process. Proper spark plug gap and condition are also crucial‚ detailed within the service guides. Troubleshooting ignition issues often involves checking wiring connections and ensuring proper grounding for reliable engine starting.
Fuel System
Briggs & Stratton repair manuals dedicate significant attention to the fuel system‚ as proper fuel delivery is vital for engine operation. This system encompasses the fuel tank‚ fuel lines‚ fuel filter‚ and carburetor. Manuals provide detailed diagrams and instructions for disassembly‚ cleaning‚ and reassembly of the carburetor.
Troubleshooting fuel-related issues often involves checking for clogged fuel lines or a dirty fuel filter. Service personnel utilize these guides to diagnose and resolve problems like fuel leaks or insufficient fuel supply‚ ensuring optimal engine performance and longevity.
Common Briggs & Stratton Engine Problems
Repair manuals address frequent issues like engines failing to start‚ running roughly‚ overheating‚ and experiencing oil leaks‚ offering diagnostic steps and repair procedures.
Engine Won’t Start
Diagnosing a non-starting Briggs & Stratton engine requires systematic troubleshooting‚ as detailed in the repair manual. Common causes include a faulty spark plug‚ a clogged carburetor‚ or insufficient fuel supply.
The manual guides technicians through checking the ignition system‚ verifying spark‚ and inspecting the fuel lines for obstructions.
It also covers examining the safety interlocks‚ ensuring they aren’t preventing engine operation.
Furthermore‚ the manual provides instructions for testing the recoil starter mechanism and confirming proper compression‚ essential steps for a successful restart.
Detailed diagrams aid in identifying components and understanding their function.
Engine Runs Rough
A Briggs & Stratton engine running roughly often indicates issues within the carburetor or fuel system‚ as explained in the repair manual. Common culprits include a dirty carburetor jet‚ a vacuum leak‚ or stale fuel.
The manual instructs technicians to thoroughly clean the carburetor‚ checking for blockages and adjusting the fuel mixture.
It also details how to inspect the intake manifold for leaks and verify the proper operation of the governor.
Spark plug condition and valve clearances are also addressed‚ as these impact combustion quality.
Illustrated parts lists assist in identifying and replacing worn components.
Overheating Issues
Briggs & Stratton engine overheating‚ as detailed in the repair manual‚ frequently stems from inadequate cooling or excessive engine load. The manual emphasizes checking the cooling fan and shroud for damage or obstructions‚ ensuring proper airflow.
Low oil levels are a critical concern‚ as lubrication is vital for heat dissipation.
Inspect the cylinder head fins for debris that restricts cooling.
The manual also guides technicians to verify the carburetor isn’t running too lean‚ which can cause elevated temperatures.
Proper valve timing is crucial for efficient operation and preventing overheating.
Oil Leaks
The Briggs & Stratton repair manual identifies several common sources of oil leaks. A frequently cited issue is a deteriorated valve cover gasket‚ easily addressed with replacement parts detailed in parts diagrams.
The manual stresses inspecting the oil drain plug and its washer for tightness and damage.
Crankshaft and camshaft seals are also potential leak points‚ requiring specialized tools for removal and installation.
Checking the oil level and observing leak patterns helps pinpoint the source.
Proper torque specifications‚ found within the manual‚ are vital during reassembly.

Using a Briggs & Stratton Repair Manual
Manuals assist technicians with repair and maintenance‚ offering diagrams and instructions. Locate the correct manual and prioritize safety precautions before operation.
Locating the Correct Manual
Finding the appropriate Briggs & Stratton repair manual is crucial for successful engine work. Begin by identifying your engine’s model number‚ typically found on the engine’s housing or within the original equipment’s documentation. Utilize Briggs & Stratton’s official website‚ searching by this model number to access operators manuals or illustrated parts lists.
Alternatively‚ explore online PDF resources‚ ensuring the manual corresponds precisely to your engine’s specifications. Incorrect manuals can lead to improper repair procedures and potential damage. Remember to carefully follow the instructions provided for accurate identification.
Understanding Manual Diagrams
Briggs & Stratton repair manuals heavily utilize exploded-view diagrams to illustrate component relationships and assembly sequences. These diagrams are essential for identifying parts and understanding how they fit together. Pay close attention to key numbers and corresponding parts lists‚ ensuring accurate identification before commencing any repair.
Familiarize yourself with common symbols used in the diagrams‚ representing fasteners‚ gaskets‚ and other crucial elements. Careful study of these illustrations will significantly enhance your ability to disassemble‚ repair‚ and reassemble your engine correctly.
Safety Precautions
Before any repair work‚ disconnect the spark plug wire to prevent accidental starting. Fuel is highly flammable; always work in a well-ventilated area‚ away from open flames or sparks. Wear appropriate safety glasses to protect your eyes from debris and fluids.
Allow the engine to cool completely before handling hot components. Properly dispose of used oil and fuel according to local regulations. Instructions within the manual should be followed diligently‚ prioritizing personal safety throughout the entire repair process.

Essential Repair Tools
Successful Briggs & Stratton engine repair demands both basic hand tools and specialized engine equipment‚ alongside essential diagnostic instruments for accurate assessment.
Basic Hand Tools
Essential for any Briggs & Stratton engine repair‚ a fundamental set of hand tools forms the foundation of most procedures. This includes a socket set covering common sizes found on these engines‚ alongside open-end and box-end wrenches for various fasteners.
Screwdrivers – both flathead and Phillips head – are crucial for disassembly and reassembly. Pliers‚ including needle-nose and slip-joint‚ provide versatility for gripping and manipulating parts. A good quality hammer is also necessary‚ alongside punches and chisels for stubborn components.
Don’t forget measuring tools like a ruler and feeler gauges for precise adjustments. These basic tools‚ when combined with a repair manual‚ empower technicians to tackle many common engine issues effectively.
Specialized Engine Tools
Beyond basic hand tools‚ Briggs & Stratton engine repair often necessitates specialized equipment for accurate diagnosis and effective fixes. A compression tester is vital for evaluating cylinder health‚ while a spark tester confirms ignition system functionality.
Valve spring compressors are essential for valve maintenance‚ and a flywheel puller simplifies removing the flywheel for ignition component access. Carburetor cleaning tools‚ including jets and nozzles‚ ensure optimal fuel delivery.
Timing lights aid in precise ignition timing adjustments. Investing in these tools‚ alongside a detailed repair manual‚ significantly enhances the quality and efficiency of engine servicing.

Diagnostic Equipment
Accurate diagnosis is paramount in Briggs & Stratton engine repair‚ demanding more than just observation. A multimeter is crucial for testing electrical components like coils and solenoids‚ verifying voltage and continuity. A dwell meter assists in setting proper ignition timing‚ impacting performance.
Leak-down testers pinpoint cylinder leakage‚ revealing piston ring or valve issues. Fuel pressure gauges assess fuel system delivery‚ identifying pump or filter problems. Utilizing these tools‚ alongside a comprehensive repair manual‚ allows technicians to efficiently isolate faults and implement targeted solutions.

Step-by-Step Repair Procedures
Detailed manuals guide carburetor cleaning‚ ignition coil replacement‚ valve adjustments‚ and even complex procedures like piston and ring replacement for Briggs & Stratton engines.
Carburetor Cleaning and Adjustment
Carburetor issues are frequent in small engines‚ necessitating thorough cleaning and precise adjustment. Repair manuals emphasize disassembling the carburetor‚ carefully noting component placement for reassembly.
Utilize carburetor cleaner to dissolve varnish and debris from jets and passages‚ ensuring complete flow. Manuals provide detailed diagrams illustrating proper jet sizes and adjustment settings.
Pay close attention to the float level‚ a critical factor in fuel mixture control. After cleaning‚ adjust the idle speed and mixture screws according to the manual’s specifications for optimal engine performance.
Proper adjustment ensures smooth operation and fuel efficiency.
Ignition Coil Replacement
A faulty ignition coil can cause a no-start condition or erratic engine running. Repair manuals guide technicians through the coil replacement process‚ emphasizing safety precautions.
Disconnect the spark plug wire and carefully remove the old coil‚ noting the position of any retaining clips or screws. Before installing the new coil‚ inspect the flywheel key for damage‚ as this impacts timing.
Manuals detail proper air gap settings between the coil and flywheel. Securely mount the new coil and reconnect the spark plug wire‚ ensuring a firm connection for reliable ignition.
Testing with a multimeter is recommended.
Valve Adjustment
Proper valve clearance is crucial for optimal engine performance; repair manuals provide detailed valve adjustment procedures. Incorrect clearance leads to reduced power and potential engine damage.
The process involves removing the valve cover and rotating the engine to specific timing marks. Using feeler gauges‚ measure the clearance between the valve stem and rocker arm.
Manuals specify the correct clearance specifications for each engine model. Adjust as needed by turning the adjusting screw‚ rechecking with the feeler gauge until accurate. Reinstall the valve cover with a new gasket.
Ensure proper torque is applied.
Piston and Ring Replacement
Piston and ring replacement‚ detailed in repair manuals‚ is necessary when significant wear or damage occurs‚ impacting compression. This procedure requires complete engine disassembly.
Carefully remove the connecting rod cap and push the piston out through the top of the cylinder. Inspect the cylinder bore for scoring or damage. Install new piston rings‚ staggering the gaps‚ and lubricate them.
Reinstall the piston‚ connecting rod‚ and cap‚ ensuring proper orientation. Torque all fasteners to the manufacturer’s specifications. Manuals provide torque values and diagrams.
Verify piston movement is smooth.

Finding Briggs & Stratton Parts
Parts can be sourced from online retailers‚ local hardware stores‚ and using detailed parts diagrams found within repair manuals.
Illustrated parts lists aid in identifying the correct components for your specific engine model.
Online Parts Retailers
Numerous online retailers specialize in Briggs & Stratton engine parts‚ offering a vast selection and convenient ordering processes. These platforms frequently feature parts diagrams and search tools to help pinpoint the exact component needed for your specific engine model.
Many retailers provide detailed parts breakdowns and compatibility information‚ ensuring accurate purchases. Comparing prices across different websites is advisable to secure the best deal. Remember to verify shipping costs and return policies before finalizing your order. Utilizing the engine’s model and serial number is crucial for accurate parts identification.
Local Hardware Stores
Many local hardware stores stock a selection of common Briggs & Stratton engine parts‚ offering a convenient option for immediate repairs. While their inventory may be limited compared to online retailers‚ they can be invaluable for frequently needed items like spark plugs‚ air filters‚ and oil.
Knowledgeable staff can often assist in identifying the correct parts‚ especially if you bring the engine’s model and serial number. Checking local store inventories online before visiting can save time. Don’t hesitate to inquire about special orders if the desired part isn’t in stock.
Using Parts Diagrams
Briggs & Stratton repair manuals and online resources extensively utilize parts diagrams. These exploded views clearly illustrate how components fit together‚ aiding in identification and assembly. Parts diagrams are crucial for ordering the correct replacements‚ as they provide part numbers and detailed depictions.
Carefully study the diagram corresponding to your engine model. Pay attention to the orientation and relationships between parts. Online parts retailers often integrate diagrams directly into their ordering systems‚ simplifying the process. Accurate diagram interpretation minimizes errors and ensures successful repairs.

Briggs & Stratton Service Manuals ⎯ PDF Resources
PDF manuals for Briggs & Stratton engines are readily accessible online‚ offering convenient access to repair information and parts lists for technicians.
Accessing Online PDF Manuals
Briggs & Stratton provides a wealth of resources for locating PDF manuals online‚ streamlining the repair process for engine owners and service professionals. Finding the correct manual involves following specific instructions on their official website‚ often requiring the engine model number and code.
Numerous third-party websites also archive these manuals‚ offering an alternative avenue for access. However‚ verifying the manual’s accuracy and relevance to your specific engine is crucial. Downloading these PDF files is generally straightforward‚ allowing for offline viewing and convenient printing for use in the workshop or during on-site repairs.
Downloading and Printing Manuals
Once you’ve located the desired Briggs & Stratton repair manual in PDF format‚ the downloading process is typically simple – a direct click or a “save” option within your browser. Ensure sufficient storage space on your device before initiating the download‚ as some manuals can be relatively large files‚ exceeding 35 Megabytes.
Printing is equally accessible; open the PDF with a compatible reader and utilize the print function. Consider printing only the sections relevant to your immediate repair needs to conserve paper and ink. A clear‚ legible printout is essential for effective troubleshooting and accurate maintenance.

Maintenance Schedules & Preventative Care
Regular oil changes‚ air filter replacements‚ and spark plug upkeep are crucial for Briggs & Stratton engine longevity‚ preventing costly repair needs.
Oil Change Intervals
Regular oil changes are paramount for maintaining optimal Briggs & Stratton engine performance and extending its lifespan. The frequency depends heavily on usage and operating conditions. For typical residential lawnmower use‚ an annual oil change is generally recommended.
However‚ engines subjected to heavy loads‚ dusty environments‚ or commercial applications require more frequent intervals – potentially every 25 to 50 hours of operation. Always consult your specific engine’s service manual for precise recommendations.
Neglecting oil changes leads to increased friction‚ wear‚ and potential engine failure‚ ultimately necessitating more extensive and costly repair work.
Air Filter Replacement
Maintaining a clean air filter is crucial for ensuring proper engine combustion and preventing premature wear on internal components within your Briggs & Stratton engine. A clogged air filter restricts airflow‚ leading to reduced power‚ increased fuel consumption‚ and potential engine damage.
Replacement frequency depends on operating conditions; dusty environments necessitate more frequent changes. Generally‚ inspect the air filter every 25 hours of use and replace it when visibly dirty.
Refer to your engine’s service manual for specific recommendations and proper filter type.
Spark Plug Maintenance
Proper spark plug maintenance is vital for optimal Briggs & Stratton engine performance and reliable starting. A worn or fouled spark plug can cause misfires‚ reduced power‚ and increased fuel consumption. Regularly inspect the spark plug for signs of wear‚ carbon buildup‚ or damage.
Cleaning a spark plug can sometimes restore functionality‚ but replacement is often recommended annually or after 100 hours of operation.
Always consult your engine’s service manual for the correct spark plug type and gap specification before installation.