
GE RV Air Conditioner Manual: Comprehensive Guide
This comprehensive guide details operation‚ maintenance‚ and troubleshooting for your GE RV air conditioner‚ ensuring optimal performance and longevity for years of comfortable travels․
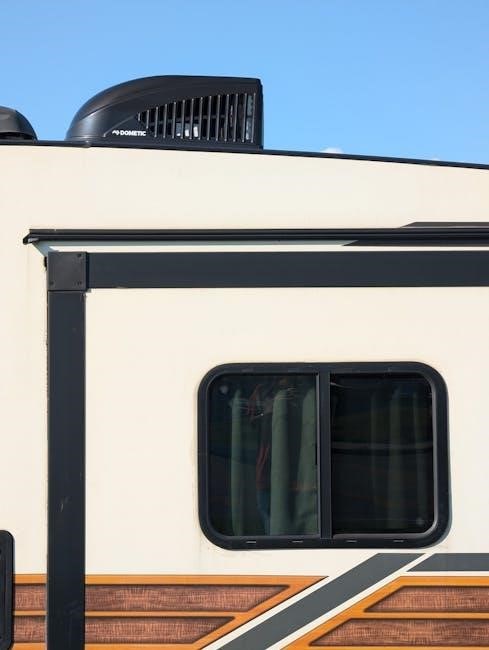
GE RV air conditioners are designed to provide reliable and efficient cooling and‚ in some models‚ heating for recreational vehicles․ These units are specifically engineered to withstand the rigors of travel and deliver consistent comfort in varying climates․ Understanding the features and operation of your GE RV air conditioner is crucial for maximizing its performance and extending its lifespan․
Modern GE RV air conditioners often incorporate smart technology‚ like the RARWT Single Zone Smart Thermostat‚ offering remote control and advanced diagnostic capabilities․ Proper installation‚ as outlined in accompanying manuals‚ is paramount for optimal functionality․ Regular maintenance‚ including air filter cleaning and coil inspection‚ is essential to prevent issues like freezing and ensure efficient operation․ This manual will guide you through these processes‚ helping you maintain a comfortable RV environment throughout your adventures․
Understanding Your Model Number
Your GE RV air conditioner’s model number is key to accessing specific information regarding its features‚ parts‚ and warranty․ This alphanumeric code‚ typically found on the unit’s exterior or in the owner’s manual‚ uniquely identifies your particular model․ Knowing your model number is essential when ordering replacement parts‚ contacting customer support‚ or downloading specific documentation․
For example‚ models like the ARH15AACB (RV Rooftop Air Conditioner with Heat Pump) denote specific capabilities․ The RARWT1W identifies a Single Zone RV Thermostat․ Referencing the model number ensures you receive accurate guidance for installation‚ operation‚ and troubleshooting․ GE Appliances provides detailed resources based on these identifiers․ Always have your model number readily available when seeking assistance or performing maintenance to guarantee compatibility and correct procedures․
Safety Precautions
Prioritizing safety is crucial when installing and operating your GE RV air conditioner․ Always disconnect power before performing any maintenance or repairs to prevent electrical shock․ Ensure the unit is securely mounted to withstand travel vibrations and weather conditions․ Never operate the air conditioner with damaged cords or plugs‚ and avoid using extension cords․
Proper ventilation is essential; do not obstruct airflow around the unit․ Be mindful of the potential for freezing‚ which can damage the coils – regular filter cleaning helps prevent this․ California residents should heed the Proposition 65 warning regarding potential chemical exposure․ If you detect unusual noises‚ smells‚ or performance issues‚ immediately discontinue use and consult a qualified technician․ Following these precautions ensures safe and reliable operation․

Installation & Setup
Proper installation is key for efficient cooling․ Verify all package contents‚ carefully follow wiring diagrams‚ and securely mount the unit to your RV’s roof structure․
Package Contents Verification
Before beginning installation‚ carefully unpack your GE RV air conditioner and verify all components are present․ A complete package typically includes the rooftop air conditioning unit itself‚ a base pan‚ a control panel or thermostat (RARWT1W models)‚ mounting hardware – often consisting of brackets‚ screws‚ and sealant – and a detailed installation manual․
Inspect each item for any shipping damage․ Note any missing parts or damage immediately and contact your retailer or GE Appliances customer support․ Ensure you have the correct wiring harness for your specific model and RV electrical system․ The RARMN1A interior duct kit may be a separate purchase depending on your setup․ Confirm the presence of all necessary documentation‚ including warranty information and Proposition 65 warnings for California residents․ Thorough verification now prevents delays and ensures a smooth installation process․
Wiring Diagrams & Terminal Connections
Proper wiring is crucial for safe and efficient operation․ Refer to the wiring diagram included with your GE RV air conditioner and the RARWT1W thermostat owner’s manual for specific terminal connections․ For 1-stage heat/1-stage cool systems‚ Table 1 details three-wire configurations․
Typically‚ connections include hot (L)‚ neutral (N)‚ and ground․ If a furnace isn’t connected to the RVAC control‚ specific wiring procedures apply․ Carefully identify each wire before connecting it to the appropriate terminal․ Incorrect wiring can damage the unit or create a safety hazard․ Double-check all connections for tightness and ensure proper insulation․ If you are uncomfortable with electrical work‚ consult a qualified RV technician․ Always disconnect power before making any wiring adjustments․

Mounting and Securing the Unit

Secure mounting is essential to prevent damage during travel and ensure efficient cooling․ The rooftop unit must be installed on a structurally sound roof capable of supporting its weight‚ plus the weight of accumulated snow or rain․ Follow the detailed installation instructions provided with your GE ARH15 RV Rooftop Air Conditioner․
Ensure a watertight seal around the unit’s base to prevent leaks․ Use appropriate RV-specific sealant recommended by the manufacturer․ Verify the unit is level for optimal drainage․ Interior ductwork (RARMN1A) should be securely fastened‚ providing efficient airflow․ Regularly inspect mounting hardware and sealant for signs of wear or deterioration‚ and address any issues promptly․ Proper installation contributes significantly to the longevity and performance of your air conditioning system․

Operating Instructions
Effortless climate control is at your fingertips with the intuitive controls‚ allowing you to select cooling‚ heating (if equipped)‚ or fan-only modes for personalized comfort․
Control Panel Overview
The control panel serves as the central hub for managing your GE RV air conditioner․ Familiarize yourself with its features for optimal operation․ Typically‚ you’ll find power buttons for turning the unit on and off‚ alongside mode selection buttons for Cool‚ Heat (if applicable)‚ and Fan-only operation․
Up and down arrow keys allow precise temperature adjustment‚ setting your desired comfort level․ A digital display clearly shows the current temperature and selected settings․ Some models feature a ‘Sleep’ mode for energy-saving operation during rest․ The RARWT1W model includes on-board diagnostics and displays fault codes for troubleshooting;
Pay attention to indicator lights; a flashing HEAT-PUMP icon with a 99F/99C code signals a potential over-temperature issue․ Understanding these indicators is crucial for maintaining your system․ The control panel’s layout is designed for intuitive use‚ ensuring easy access to all essential functions․
Cool Mode Operation
To activate Cool Mode‚ press the ‘Cool’ button on the control panel․ Once selected‚ utilize the up and down arrow keys to establish your preferred target temperature․ The air conditioner will then work to maintain this temperature‚ cycling the compressor as needed․
In Cool mode‚ consider fan speed settings for customized airflow․ Higher fan speeds enhance cooling but consume more energy․ Regularly cleaning the interior return air filters is vital in this mode‚ maximizing efficiency and preventing freezing․
Allowing the unit’s fins to dry between compressor cycles can further reduce the risk of freezing․ If the unit isn’t cooling effectively‚ check for blocked vents or a dirty filter․ Proper airflow is essential for optimal performance․ Remember to monitor for potential issues like the 99F/99C error code‚ indicating an over-temperature condition․
Heat Mode Operation (If Applicable)
If your GE RV air conditioner is equipped with a heat pump‚ activating Heat Mode is done via the ‘Heat’ button on the control panel․ Similar to Cool Mode‚ use the arrow keys to set your desired temperature․ The system will then engage to provide warmth‚ utilizing the heat pump to extract heat from the outside air․
During Heat Mode‚ a flashing HEAT-PUMP icon accompanied by a 99F (99C) code signals an indoor coil temperature exceeding 135F (58C)․ This triggers compressor shutdown․ Increasing airflow by cleaning filters and opening vents is recommended to resolve this․
Ensure adequate ventilation around the unit for efficient operation․ Regularly inspect for obstructions that might hinder airflow; Remember that heat pump efficiency decreases in extremely cold temperatures․ Proper maintenance is crucial for reliable heating performance․
Fan Mode Operation
Activating Fan Mode on your GE RV air conditioner is straightforward – simply press the ‘Fan’ button on the control panel․ This operates the internal blower fan without engaging the cooling or heating functions․ You can select from multiple fan speeds (Low‚ Medium‚ High) to customize airflow within your RV․
Fan Mode is ideal for circulating air‚ removing stale odors‚ or supplementing existing heating or cooling․ Utilizing the fan between compressor cycles can help dry the evaporator coil‚ reducing the likelihood of freezing․ This is particularly beneficial in humid conditions․
Regularly cleaning the interior return air filters is essential for optimal fan performance and air quality․ Ensure the fan blades are free from dust and debris for efficient operation․ Fan Mode consumes less energy than cooling or heating modes․
Temperature Adjustment
Adjusting the target temperature on your GE RV air conditioner is done using the ‘Up’ and ‘Down’ arrow buttons located on the control panel․ Once you’ve selected ‘Cool’ or ‘Heat’ mode‚ these buttons allow you to set your desired temperature․ The display will show the setpoint temperature․
The thermostat maintains the set temperature by cycling the compressor or heater on and off․ Smaller temperature differences between the setpoint and the actual RV temperature will result in more frequent cycling․ Allow sufficient time for the unit to reach the desired temperature after adjustment․
Remember to consider external factors like sunlight and RV insulation when setting the temperature․ Opening vents strategically can improve airflow and temperature distribution throughout the RV․

Maintenance & Troubleshooting
Regular maintenance‚ including filter cleaning and coil inspection‚ is crucial for optimal performance․ Addressing issues promptly‚ like freezing or error codes‚ extends the unit’s lifespan․
Air Filter Cleaning & Replacement
Maintaining a clean air filter is paramount for efficient cooling and preventing potential issues with your GE RV air conditioner․ The interior return air filters should be cleaned regularly to ensure proper airflow․ A dirty filter restricts airflow‚ potentially leading to reduced cooling capacity‚ increased energy consumption‚ and even freezing of the evaporator coil․
Cleaning Frequency: It’s recommended to inspect the filter monthly and clean or replace it as needed‚ especially during periods of heavy use or dusty conditions․ For optimal performance‚ consider replacing the filter every 3-6 months․
Cleaning Procedure: Gently remove the filter from its housing․ You can wash reusable filters with mild soap and water‚ ensuring they are completely dry before reinstalling․ Disposable filters should be replaced with a new filter of the correct size and type․ Always refer to your specific model’s documentation for filter specifications․
Proper Installation: Ensure the filter is correctly seated in the housing to prevent air bypass․ A properly installed filter maximizes airflow and protects the unit from dust and debris․
Coil Cleaning Procedures
Regular coil cleaning is crucial for maintaining the efficiency and lifespan of your GE RV air conditioner․ Over time‚ dust and debris accumulate on the evaporator and condenser coils‚ hindering heat transfer and reducing cooling performance․ This can also contribute to freezing issues․

Cleaning the Evaporator Coil: Access the evaporator coil (typically located inside the RV) and gently vacuum away loose dust․ Use a soft brush attachment to avoid damaging the delicate fins․ A no-rinse coil cleaner can be applied‚ following the manufacturer’s instructions‚ to dissolve stubborn dirt․
Cleaning the Condenser Coil: The condenser coil is located on the rooftop unit․ Carefully clean the fins with a soft brush and water spray․ Avoid high-pressure washing‚ as it can bend the fins․ Allowing the fins to dry between compressor cycles helps reduce freezing․
Safety First: Always disconnect power to the air conditioner before cleaning the coils․ Wear appropriate safety glasses and gloves during the cleaning process․
Addressing Heat Pump Over Temperature Errors (Code 99F/99C)
A flashing HEAT-PUMP icon accompanied by error code 99F (or 99C) indicates an over-temperature condition within the indoor coil of your GE RV air conditioner’s heat pump system․ This signifies the coil temperature exceeded 135°F (58°C)‚ causing the compressor to shut down as a safety measure․
Immediate Actions: The primary solution is to improve airflow․ Begin by thoroughly cleaning or replacing the air filter‚ as a clogged filter restricts air circulation․ Ensure all supply vents are fully open and unobstructed‚ allowing for maximum airflow throughout the RV․
Further Investigation: If the error persists‚ inspect the condenser coil for debris․ Restricted airflow across the outdoor unit can also contribute to overheating․ Consider professional servicing if the issue continues‚ as it may indicate a more complex problem with the heat pump system․
Diagnosing Freezing Issues
Ice formation on your GE RV air conditioner can significantly reduce cooling efficiency․ A common cause is restricted airflow‚ hindering proper heat exchange․ Regularly cleaning the interior return air filters is crucial to prevent this‚ ensuring unobstructed air circulation․
Troubleshooting Steps: Begin by verifying the air filter is clean․ Next‚ confirm all vents are open‚ allowing the unit to circulate air effectively․ The unit’s design allows fins to dry between compressor cycles‚ reducing freeze-up potential․
Further Checks: Low refrigerant levels or a malfunctioning blower motor can also cause freezing․ If cleaning the filter and checking vents don’t resolve the issue‚ professional servicing is recommended to diagnose and address these more complex problems․ Ignoring freezing can lead to compressor damage․
Understanding Fault Codes
GE RV air conditioners utilize fault codes to signal internal issues‚ aiding in diagnosis and repair․ These codes‚ displayed on the RARWT1W thermostat‚ provide valuable insights into the problem’s nature․ Recognizing these codes empowers users and technicians to address issues efficiently․

Common Codes: A flashing HEAT-PUMP icon accompanied by “99F” (or “99C”) indicates an indoor coil over-temperature situation‚ typically exceeding 135°F (58°C)․ This often suggests restricted airflow‚ prompting filter cleaning and vent opening․ Other codes may relate to sensor failures or compressor issues․
Diagnostic Resources: Refer to the owner’s manual or GE Appliances’ support website for a complete list of fault codes and their corresponding solutions․ Proper interpretation of these codes is essential for effective troubleshooting and maintaining optimal air conditioner performance․
Warranty Information
GE Appliances provides a comprehensive warranty covering products and parts for a period of two years‚ ensuring peace of mind and lasting value․
GE Appliances Warranty Coverage

GE Appliances stands behind its RV air conditioners with a commitment to quality and customer satisfaction․ This warranty coverage extends for a period of two years from the original date of purchase‚ encompassing both the product itself and any necessary parts required for repair or replacement;
The warranty covers defects in materials and workmanship under normal residential use․ Should a defect arise during the warranty period‚ GE Appliances will‚ at its discretion‚ repair or replace the defective part or unit‚ free of charge․ This coverage is applicable to the original purchaser and is non-transferable․
However‚ it’s important to note that the warranty does not cover damage resulting from misuse‚ accident‚ improper installation‚ unauthorized repairs‚ or acts of God․ Regular maintenance‚ such as air filter cleaning‚ is the owner’s responsibility and is not covered under warranty․ Proof of purchase is required to validate any warranty claim․ For complete details and to initiate a claim‚ please visit the GE Appliances website or contact their customer support team․
Proposition 65 Warning (California Residents)
California Proposition 65 requires businesses to provide warnings if their products expose consumers to chemicals known to the State of California to cause cancer or reproductive harm․ This GE RV air conditioner‚ like many appliances containing electrical components and metal parts‚ may contain trace amounts of substances listed under Proposition 65․
These substances‚ including but not limited to lead‚ cadmium‚ and phthalates‚ are present in materials used in the manufacturing process․ However‚ under normal use conditions‚ exposure to these chemicals is minimal and within acceptable limits established by regulatory agencies․
GE Appliances complies fully with Proposition 65 and provides this warning as a precautionary measure․ It is not necessarily an indication that the product poses a significant health risk․ For more information about Proposition 65‚ please visit the California Office of Environmental Health Hazard Assessment website or contact GE Appliances directly․ Your safety is our priority․