Vision Pro 8000 Manual: Comprehensive Guide
This comprehensive guide details the Honeywell Vision Pro 8000 thermostat, offering step-by-step instructions for installation, operation, and troubleshooting.
Explore features like touchscreen navigation, programmable schedules, and RedLINK connectivity, ensuring optimal home comfort and energy efficiency.
Keep this manual for future reference and access the official 69-1894EFS-03 document for detailed information and safety guidelines.
Welcome to the Honeywell Vision Pro 8000, a touchscreen programmable thermostat designed for effortless control of your home’s heating and cooling systems. This thermostat, part of the TH8000 series, offers a user-friendly interface and advanced features to optimize comfort and energy savings;
This manual serves as your primary resource for understanding and utilizing the full potential of your new thermostat. Whether you’re a homeowner or a professional installer, you’ll find detailed instructions and wiring diagrams to ensure a smooth setup and operation. The Vision Pro 8000 supports various system configurations, including 1H/1C and 3H/2C setups, and is compatible with RedLINK enabled systems.
Please retain this manual (69-1894EFS-03) for future reference, as it contains vital information regarding safety, troubleshooting, and warranty details.
Understanding the TH8000 Series
The Honeywell TH8000 series represents a significant advancement in home comfort technology, offering a range of programmable thermostats designed for diverse heating and cooling needs. The Vision Pro 8000, a flagship model, boasts a vibrant touchscreen display and intuitive navigation, simplifying temperature management.
This series is characterized by its versatility, supporting both conventional and advanced HVAC systems. Models like the TH8110U cater to 1 Heat/1 Cool systems, while others accommodate more complex configurations. Key features include programmable schedules, humidity control, and compatibility with accessories like the ISU 101.
The TH8000 series also incorporates RedLINK technology, enabling wireless communication and simplified installation. Refer to manual 69-1894EFS-03 for detailed model specifications and compatibility information.
Key Features and Benefits
The Vision Pro 8000 delivers exceptional control and convenience, boasting a user-friendly touchscreen interface for effortless programming and adjustments. RedLINK enabled systems simplify installation and offer reliable wireless communication. Enjoy precise temperature management with 7-day programmable schedules, optimizing comfort and energy savings.
Advanced features include humidity control, allowing for a more comfortable indoor environment, and compatibility with external sensors. The Universal (U) terminal provides flexibility for various system configurations, including auto changeover.
Benefit from improved energy efficiency, reduced utility bills, and a consistently comfortable home. This thermostat supports both manual and automatic operation modes, adapting to your preferences.
Installation and Wiring
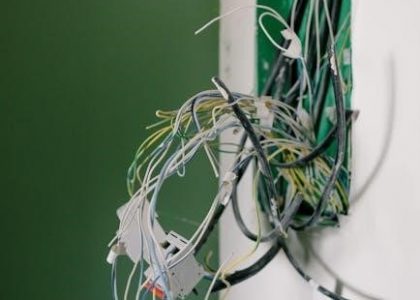
Proper installation is crucial for optimal performance. This section provides detailed wiring diagrams for 1H/1C and 3H/2C systems, ensuring correct terminal connections.
Follow the instructions carefully!
Wiring Diagrams: 1H/1C Systems
For 1 Heat/1 Cool (1H/1C) systems, the Vision Pro 8000 utilizes a simplified wiring configuration. Connect the R wire to the Rh terminal for heating and Rc for cooling. The C wire provides 24VAC common power, essential for consistent operation.
The W wire controls the heating system, while the Y wire activates the cooling. Ensure secure connections to avoid intermittent issues.
Refer to the diagram in the official manual (69-1894EFS-03) for a visual representation.
The U1 terminal, if used, requires specific configuration for auto changeover. Double-check all connections before powering on the system. Incorrect wiring can damage the thermostat or HVAC equipment.
Always disconnect power at the breaker before working with wiring.
Wiring Diagrams: 3H/2C Systems
3H/2C systems, featuring three heating stages and two cooling stages, require a more complex wiring setup for the Vision Pro 8000. Utilize terminals Rh, R, and Rc for heating, and Y and Y2 for cooling stages. The C wire remains crucial for consistent power.
W1, W2, and W3 wires control the three heating stages, providing staged heating for optimal comfort and efficiency.
Consult the detailed wiring diagram in the 69-1894EFS-03 manual for precise terminal assignments.
Proper configuration of the U1 terminal is vital for correct changeover operation. Verify all connections before restoring power. Incorrect wiring can lead to system malfunction or damage.
Safety first: disconnect power before any wiring work.
Understanding Terminal Designations (R, C, W, Y, G)
Decoding terminal designations is crucial for correct Vision Pro 8000 installation. ‘R’ signifies the 24VAC power source, with ‘Rh’ for heating and ‘Rc’ for cooling. The ‘C’ terminal provides the common wire, essential for consistent thermostat power.
‘W’ controls heating, with ‘W1’ being the first stage and ‘W2/W3’ for staged heating. ‘Y’ activates cooling, and ‘Y2’ engages the second cooling stage in 3H/2C systems.
‘G’ operates the fan.
Refer to the manual (69-1894EFS-03) for specific wiring configurations based on your HVAC system. Incorrect connections can cause malfunctions. Always disconnect power before wiring.
Understanding these designations ensures proper system operation and prevents damage.
RedLINK Enabled Systems
RedLINK simplifies thermostat wiring, eliminating the need for a common (C) wire in many applications. This wireless technology enables communication between the Vision Pro 8000 and compatible Honeywell accessories, like the ISU 101.
For systems without a C-wire, the Vision Pro 8000 can often ‘borrow’ power through the RedLINK connection. However, a C-wire is still recommended for optimal performance and to support all features.
Ensure the receiver module is properly paired with the thermostat during installation. Refer to the manual (69-1894EFS-03) for detailed RedLINK setup instructions and troubleshooting tips.
RedLINK offers convenience and flexibility, streamlining the installation process.
Thermostat Operation
The Vision Pro 8000 features an intuitive touchscreen interface for easy control. Users can navigate settings, adjust temperatures, and program schedules effortlessly.
Explore heat/cool modes and customize comfort preferences.
Navigating the Touchscreen Interface
The Vision Pro 8000 boasts a user-friendly touchscreen interface designed for intuitive operation. The main screen displays current temperature, setpoint, and operating mode. Swiping left or right accesses different menu options, including scheduling, system settings, and fan control.
Tapping icons provides access to detailed settings. For example, the “Menu” icon reveals options for setting the date and time, configuring system parameters, and accessing advanced features. A dedicated “Hold” button allows temporary overrides of programmed schedules.
The touchscreen responds to gentle touches; avoid excessive pressure. Contextual help is often available by tapping the question mark icon. Familiarize yourself with the icons and menu structure for efficient thermostat control. The interface is designed for easy readability and effortless navigation.
Setting the Date and Time
Accurate date and time settings are crucial for proper scheduling and thermostat operation. To set the date and time on your Vision Pro 8000, begin by tapping the “Menu” icon on the main touchscreen. Navigate to the “Settings” option, then select “Date/Time”.
A new screen will appear, allowing you to adjust the month, day, and year. Use the up and down arrows to select the correct values. Repeat this process for setting the hour and minute, ensuring AM or PM is correctly designated.
Confirm your selections by tapping “Save” or “Done”. The thermostat will automatically update its internal clock. Incorrect date/time settings can disrupt programmed schedules, so verify accuracy periodically.
Programming Temperature Schedules
The Vision Pro 8000 allows for customized temperature schedules to maximize comfort and energy savings. From the main screen, access the “Schedule” function via the “Menu” icon. You can create unique schedules for each day of the week, or copy a schedule to multiple days.
Each day is divided into multiple periods – Wake, Leave, Return, and Sleep – with adjustable temperature settings for each. Tap on a period to modify its start time and desired temperature. Utilize the touchscreen’s intuitive interface to fine-tune your preferences.
Remember to save your schedule after making changes. Experiment with different settings to find the optimal balance between comfort and energy efficiency. Regularly review and adjust schedules as needed to accommodate lifestyle changes.
Understanding Heat/Cool Modes: Auto vs. Manual
The Vision Pro 8000 offers both Auto and Manual modes for controlling your heating and cooling system. In Auto mode, the thermostat automatically switches between heating and cooling to maintain your set temperature, utilizing both systems as needed. This is ideal for fluctuating weather conditions.
Manual mode requires you to explicitly select either Heat or Cool. In Heat, the system will only provide heating, even if the temperature rises above the setpoint. Conversely, in Cool, only cooling will operate.
Manual mode is useful when you want to prioritize one system over the other, or when you have a specific heating or cooling need. The ‘U’ terminal configuration impacts automatic changeover functionality.

Advanced Features
Explore humidity control, universal terminal configurations, and seamless integration with the ISU 101 for enhanced system functionality and personalized comfort settings.
Humidity Control and Sensor Integration
The Vision Pro 8000 offers advanced humidity control capabilities when paired with a compatible Honeywell humidity sensor, such as the THP9045. This integration allows for precise monitoring and adjustment of indoor humidity levels, enhancing comfort and preventing issues like condensation or dry air.
To utilize this feature, connect the humidity sensor to the thermostat’s designated terminal. The thermostat will then display current humidity readings and enable you to set desired humidity levels within programmable schedules.
Proper humidity management contributes to a healthier indoor environment and can even reduce energy consumption by optimizing heating and cooling efficiency. Refer to the THP9045 instructions for detailed sensor installation and configuration guidance.
Enjoy a more comfortable and controlled home environment with integrated humidity control.
Universal (U) Terminal Configuration
The Universal (U) terminal on the Vision Pro 8000 provides versatile configuration options for heating and cooling systems, supporting both automatic and manual changeover functionality; This flexibility allows the thermostat to adapt to various system setups.
For automatic changeover, the thermostat intelligently switches between heating and cooling modes based on programmed temperature settings. When configured for manual changeover, the user directly selects the desired mode – Heat, Cool, or Off – to maintain the indoor temperature.
The U terminal is particularly useful for systems requiring dual-fuel operation or those with unique control requirements. Proper configuration ensures optimal system performance and user control. Consult wiring diagrams and system specifications for correct U terminal setup.
Maximize your system’s efficiency with the U terminal’s adaptable settings.
Using the ISU 101 with the Vision Pro 8000
The ISU 101, when integrated with the Vision Pro 8000, expands system capabilities, particularly in commercial applications requiring precise temperature control and zoning. It enables advanced functionalities beyond standard residential setups.
In automatic mode, the ISU 101 collaborates with the thermostat to intelligently manage heating and cooling, optimizing energy efficiency and comfort. Conversely, manual mode allows direct user control over heating or cooling, bypassing automated scheduling.
Proper integration requires careful wiring and configuration, referencing the ISU 101’s specific instructions alongside the Vision Pro 8000 manual. This ensures seamless communication and optimal performance. Refer to THP9045 instructions for more information;
Utilize the ISU 101 to unlock advanced control options.

Troubleshooting and Support
Resolve common issues using the manual’s solutions, understand error codes, and access online resources for further assistance with your Vision Pro 8000.
Find support!
Common Issues and Solutions
Display Issues: If the touchscreen is unresponsive, try resetting the thermostat by turning off the power at the breaker for one minute. A blank screen often indicates a power supply problem; verify wiring connections.
Connectivity Problems: For RedLINK enabled systems, ensure proper pairing with other devices. If connection fails, check for interference or distance limitations. Resetting the RedLINK connection may resolve issues.
Temperature Discrepancies: Inaccurate readings could stem from thermostat placement or sensor malfunctions. Calibrate the temperature setting or replace the sensor if necessary. Verify correct wiring for heat and cool stages.
Heating/Cooling Not Responding: Confirm the system is set to the correct mode (Auto, Heat, Cool). Check the circuit breaker and wiring connections to the furnace or air conditioner. A faulty relay could also be the cause.
Humidity Control Issues: If humidity control isn’t functioning, verify the humidity sensor is properly connected and calibrated. Ensure the ‘U’ terminal is configured correctly for dehumidification if applicable.
Error Codes and Their Meanings
“E1” – Low Battery: Indicates low battery power; replace batteries immediately to maintain thermostat operation and prevent data loss.
“E2” – Loss of Common Wire (C): A missing or improperly connected ‘C’ wire disrupts power to the thermostat. Verify the ‘C’ wire connection at both the thermostat and furnace/air handler.
“E3” – Heating System Failure: Signals a problem with the heating system, such as a faulty flame sensor or gas valve. Consult a qualified HVAC technician.

“E4” – Cooling System Failure: Indicates an issue with the cooling system, potentially a compressor problem or refrigerant leak. Seek professional assistance.
“E5” – Sensor Error: A faulty external sensor (humidity, temperature) is detected. Check sensor wiring and replace if necessary.

“E6” – Communication Error: Indicates a problem with RedLINK communication. Reset the connection or check for interference.

Accessing Online Resources and Support
Honeywell Home’s website provides a wealth of resources, including a comprehensive FAQ section, downloadable manuals (69-1894EFS-03), and troubleshooting guides for the Vision Pro 8000.
YouTube hosts numerous video tutorials demonstrating installation, programming, and common fixes. Search “Honeywell Vision Pro 8000” for helpful visual aids.
Honeywell’s support forum allows users to connect, share experiences, and find solutions to specific issues.
For direct assistance, contact Honeywell Home support via phone or online chat. Their expert technicians can provide personalized guidance.
HVAC professionals certified in Honeywell systems are also available for in-home service and repairs. Locate a local provider through Honeywell’s website.

Manual and Documentation
Refer to the official Honeywell Vision Pro 8000 user manual (69-1894EFS-03) for detailed safety information, warranty details, and complete operating instructions.
Locating the Official User Manual (69-1894EFS-03)
Accessing the official Honeywell Vision Pro 8000 user manual, identified as document number 69-1894EFS-03, is crucial for comprehensive understanding and proper operation of your thermostat. This manual provides detailed instructions, wiring diagrams, troubleshooting guidance, and important safety information.
You can typically find a digital copy of this manual by searching online using the document number. Honeywell’s official website is a reliable source, as are various HVAC resource websites. Ensure the manual downloaded matches your specific TH8000 series model for accurate information.
Keeping a copy readily available – both digital and physical – is highly recommended for future reference during installation, programming, or when addressing any operational concerns. The manual is your primary resource for maximizing the benefits of your Vision Pro 8000 system.
Important Safety Information
Prior to installation and operation of your Honeywell Vision Pro 8000 thermostat, carefully review the safety precautions outlined in the official user manual (69-1894EFS-03). Electrical shock hazard exists – always disconnect power at the breaker before wiring.
Installation should be performed by a qualified technician if you are unfamiliar with electrical systems. Improper wiring can damage the thermostat or your HVAC equipment, and potentially create a fire hazard.
Do not expose the thermostat to excessive moisture or extreme temperatures. Keep the device dry and avoid operating it in environments with high humidity. Regularly inspect wiring for damage and address any issues promptly. Always adhere to local electrical codes and regulations.
Warranty Information
Honeywell warrants the Vision Pro 8000 thermostat to be free from defects in material and workmanship for a period of one (1) year from the date of purchase. This warranty applies to normal residential use and does not cover damage resulting from misuse, abuse, accident, or unauthorized modification.
To obtain warranty service, contact Honeywell directly with proof of purchase. The warranty does not cover labor costs associated with installation or removal. Honeywell’s liability is limited to the repair or replacement of the defective product, at their discretion.
This warranty gives you specific legal rights, and you may have other rights which vary by location. Refer to the complete warranty details included with your product or available on the Honeywell Home website for full terms and conditions.