Ryobi Electric Pressure Washer Manual: A Comprehensive Guide
This manual offers detailed guidance for Ryobi electric pressure washers‚ covering setup‚ operation‚ troubleshooting‚ and maintenance․ It addresses common problems like low pressure and stalling‚
ensuring optimal performance and longevity of your cleaning tool․
Ryobi electric pressure washers represent a popular choice for homeowners seeking effective and affordable cleaning solutions․ Established in 1943‚ Ryobi has built a reputation for delivering value and reliability‚ particularly within the non-professional market․ These washers offer a convenient alternative to gas-powered models‚ providing sufficient power for a wide range of tasks around the house – from cleaning decks and siding to washing vehicles and patio furniture․
Unlike their gas counterparts‚ Ryobi electric pressure washers are generally quieter‚ lighter‚ and require less maintenance․ They are powered by standard electrical outlets‚ eliminating the need for fuel and reducing emissions․ However‚ understanding the specifications‚ such as PSI (pounds per square inch) and GPM (gallons per minute)‚ is crucial for selecting the right model for your specific cleaning needs․ This guide will delve into these aspects‚ alongside safety precautions‚ operational instructions‚ and troubleshooting tips to ensure you get the most out of your Ryobi pressure washer․
This manual aims to empower users with the knowledge to confidently operate and maintain their Ryobi electric pressure washer‚ maximizing its lifespan and cleaning performance․
Understanding Pressure Washer Specifications (PSI & GPM)
Pressure washers are rated by two key specifications: PSI (pounds per square inch) and GPM (gallons per minute)․ PSI measures the force of the water stream‚ determining its ability to lift dirt and grime․ Higher PSI equates to more powerful cleaning‚ ideal for tough stains on concrete or heavily soiled surfaces․ However‚ excessive pressure can damage delicate materials․
GPM‚ on the other hand‚ indicates the volume of water delivered per minute․ A higher GPM means faster cleaning‚ as it rinses away debris more efficiently․ The combination of PSI and GPM dictates the overall cleaning power․ A balance between the two is essential; high PSI with low GPM might struggle to rinse effectively‚ while low PSI with high GPM may lack the necessary force․
Ryobi electric pressure washers offer a range of PSI and GPM combinations to suit various tasks․ Generally‚ 1700 PSI is sufficient for light-duty cleaning‚ while higher ratings are better for more demanding jobs․ Understanding these specifications allows you to choose a model that effectively addresses your cleaning requirements without causing damage․
Safety Precautions and Operating Instructions
Prioritize safety when operating your Ryobi electric pressure washer․ Always wear safety glasses to protect your eyes from debris․ Closed-toe shoes are essential‚ and consider gloves for hand protection․ Never point the wand at yourself or others․ Ensure a dry grip on the handle‚ and maintain a stable stance․
Before each use‚ inspect the power cord for damage․ Utilize a Ground Fault Circuit Interrupter (GFCI) outlet to prevent electrical shock․ Never alter the GFCI plug․ Connect the water supply after connecting the power․ Prime the pump according to the manual’s instructions before starting․
During operation‚ start with a low-pressure setting and gradually increase as needed․ Keep bystanders at a safe distance․ Avoid spraying electrical components․ When finished‚ release the pressure by turning off the machine and disconnecting the water supply․ Store the unit in a dry location․
Unboxing and Initial Setup
Carefully unpack your Ryobi electric pressure washer‚ verifying all components are present against the parts list in the manual․ These typically include the pressure washer unit‚ spray wand‚ high-pressure hose‚ various nozzles‚ detergent tank‚ and quick-connect fittings․ Inspect each part for shipping damage; report any issues immediately to the retailer․
Before initial use‚ attach the high-pressure hose to both the pressure washer outlet and the spray wand․ Securely connect the desired nozzle to the wand․ Attach the detergent tank‚ if applicable‚ ensuring it’s properly aligned and locked into place․ Double-check all connections for tightness․
Review the parts diagram to familiarize yourself with component locations․ Ensure the unloader valve and pressure switch are correctly positioned․ Do not attempt operation until all steps are completed․ Refer to the manual for specific model instructions‚ as configurations may vary․
Component Identification: Parts Diagram
The Ryobi pressure washer parts diagram is crucial for understanding your unit’s anatomy․ Key components include the high-pressure pump‚ responsible for generating cleaning force‚ and the electric motor‚ providing the power source․ Identify the unloader valve‚ which regulates pressure‚ and the pressure switch‚ controlling on/off functionality․
Locate the detergent tank and its associated inlet hose‚ used for applying cleaning solutions․ The spray wand‚ with its quick-connect mechanism‚ allows for nozzle changes․ Familiarize yourself with the various nozzles – 0°‚ 15°‚ 25°‚ 40° – each delivering a different spray pattern and intensity․
The high-pressure hose connects the pump to the wand‚ while the GFCI plug ensures electrical safety․ Understanding the location of each part aids in maintenance‚ troubleshooting‚ and potential repairs․ Refer to your specific model’s diagram for accurate component placement and identification․
Priming the Pressure Washer
Priming your Ryobi electric pressure washer is essential for initial startup and after periods of inactivity․ This process removes air from the pump‚ ensuring efficient water intake and preventing damage․ Begin by connecting the water supply and ensuring the power switch is off․
Locate the priming button or port‚ typically near the water inlet․ Turn the power switch on and press and hold the priming button for approximately 10-15 seconds‚ or until a steady stream of water exits the spray wand․ You may need to repeat this process several times․
If your model lacks a dedicated priming button‚ simply turn the unit on and allow it to run for a short period‚ observing the water flow․ A consistent‚ strong stream indicates successful priming․ Failure to prime can result in low or no water pressure‚ potentially damaging the pump․
Connecting the Water Supply
Properly connecting the water supply is crucial for the safe and effective operation of your Ryobi electric pressure washer․ Always use a clean water source‚ free from debris‚ to prevent pump damage․ Attach a standard garden hose to the water inlet connection on the pressure washer‚ ensuring a secure and leak-proof fit․
It’s recommended to use a 25-foot or shorter hose for optimal performance․ Longer hoses may reduce water pressure․ Before turning on the water supply‚ fully open the faucet to prevent strain on the pump․ Check for any kinks or obstructions in the hose that could restrict water flow․
Never draw water from sources contaminated with chemicals or oil․ Ensure the water supply is turned off before disconnecting the hose․ A consistent water supply is vital for maintaining adequate pressure and preventing overheating during operation․
Common Problems: Low or No Water Pressure
Experiencing low or no water pressure is a frequent issue with Ryobi electric pressure washers․ A primary cause is often an unprimed line; ensure the unit is properly primed before each use‚ following the priming instructions in this manual․ Verify the water supply is fully turned on and the garden hose isn’t kinked or blocked․
Check the spray nozzle for clogs or obstructions․ A partially blocked nozzle significantly reduces pressure․ Also‚ confirm the tap setting is correctly adjusted for the desired cleaning task․ Incorrect settings can limit water flow․ Inspect the water inlet screen for debris and clean it thoroughly if necessary․
If the problem persists‚ the unloader valve or pressure switch may be faulty and require inspection․ Low pressure can also indicate a failing pump‚ necessitating professional repair or replacement․
Troubleshooting: Pressure Washer Stalling
Ryobi pressure washer stalling is a common complaint among users․ Often‚ this stems from overheating‚ particularly during extended use․ Allow the unit to cool down for at least 30 minutes before attempting to restart it․ Ensure adequate ventilation around the pressure washer during operation to prevent heat buildup․
Another frequent cause is a restricted water supply․ Verify the garden hose isn’t kinked‚ and the water inlet screen is free of debris․ A clogged nozzle can also contribute to stalling‚ as the pump struggles against the back pressure․ Regularly clean the nozzle to maintain optimal flow․

Inspect the power cord and GFCI plug for damage․ Intermittent power supply can cause the motor to stall․ If stalling continues‚ the pump itself may be failing‚ requiring professional diagnosis and repair․ Remember‚ these units differ from gas-powered washers․
Troubleshooting: Overheating Issues
Overheating in Ryobi electric pressure washers is frequently reported‚ often linked to prolonged use without adequate cooling․ Immediately discontinue operation if the unit becomes excessively hot to the touch and allow it to cool completely – at least 30 minutes – before restarting․ Ensure the pressure washer is operating in a well-ventilated area‚ free from obstructions that could impede airflow․
A restricted water supply can exacerbate overheating‚ as the pump works harder․ Check for kinks in the hose and clear any debris from the water inlet screen․ Insufficient water flow prevents efficient heat dissipation․ Regularly inspect and clean the nozzle‚ as a blockage increases pump strain and heat generation․
If overheating persists‚ a faulty motor or pump component may be the culprit‚ necessitating professional repair․ Avoid continuous operation at maximum pressure for extended periods to minimize heat buildup and prolong the lifespan of your Ryobi pressure washer․
Diagnosing and Fixing Pressure Fluctuations
Pressure fluctuations in your Ryobi electric pressure washer can stem from several sources․ Begin by verifying a consistent water supply; a drop in water pressure from your source will directly impact the washer’s output․ Inspect the high-pressure hose for kinks‚ holes‚ or damage‚ as these can cause intermittent pressure loss․
A clogged nozzle is a common cause․ Remove and thoroughly clean the nozzle with a fine wire or nozzle cleaning tool to eliminate any obstructions․ Critically‚ check the unloader valve for debris or wear‚ as this component regulates pressure and can malfunction‚ leading to instability․ Inspect the pressure switch wiring and contacts for corrosion or damage․
If fluctuations continue‚ the pump itself may be failing‚ requiring professional attention․ Ensure the unit isn’t exceeding its maximum pressure rating‚ as this can strain components and cause erratic performance․ Regular maintenance and prompt attention to these areas will help maintain consistent cleaning power․
Checking the Unloader Valve
The unloader valve is a crucial component regulating pressure within your Ryobi electric pressure washer․ To inspect it‚ first‚ disconnect the power supply and relieve all water pressure․ Locate the unloader valve‚ typically near the pump outlet․ Carefully disassemble it‚ noting the position of all parts for reassembly․
Examine the valve’s internal components – the spring‚ seat‚ and poppet – for signs of wear‚ corrosion‚ or debris buildup․ A worn or damaged seat will prevent a proper seal‚ causing pressure fluctuations․ Clean all parts thoroughly with a solvent and compressed air․ Ensure the spring retains its tension; a weak spring won’t effectively regulate pressure․
Reassemble the valve precisely as it was disassembled․ If the valve appears significantly damaged‚ replacement is recommended․ A properly functioning unloader valve is essential for consistent cleaning power and prevents over-pressurization‚ safeguarding your washer and surfaces․
Inspecting the Pressure Switch
The pressure switch is vital for automatically starting and stopping your Ryobi electric pressure washer based on water pressure․ Begin by disconnecting the power supply before any inspection․ Locate the pressure switch‚ usually housed near the pump․ Carefully disconnect the wiring harness‚ noting the connections for reattachment․
Visually inspect the switch for any physical damage‚ such as cracks or corrosion․ Use a multimeter to test the switch’s continuity․ With no pressure applied‚ the switch should show an open circuit․ When pressure is applied (you may need a hand pump for testing)‚ it should close the circuit; If the switch fails this test‚ it needs replacing․
Also‚ check the wiring and connectors leading to the switch for damage or loose connections․ Ensure they are clean and securely fastened․ A faulty pressure switch can cause the washer to fail to start‚ stall unexpectedly‚ or run continuously․ Proper function ensures safe and efficient operation․

GFCI Plug and Electrical Safety
Your Ryobi electric pressure washer is equipped with a Ground Fault Circuit Interrupter (GFCI) plug for enhanced electrical safety․ This plug is designed to quickly cut off power if a ground fault is detected‚ minimizing the risk of electric shock․ Always inspect the GFCI plug before each use for any damage‚ cracks‚ or missing prongs․
Never bypass or remove the grounding pin․ Only use extension cords that are rated for outdoor use and have the same amperage or higher as the pressure washer․ Ensure the extension cord is also equipped with a GFCI․ Avoid operating the pressure washer in wet conditions or with wet hands․
Before connecting‚ verify the outlet is properly grounded․ If you’re unsure‚ consult a qualified electrician․ Regularly test the GFCI plug by pressing the “Test” button; it should trip‚ cutting off power․ If it doesn’t‚ the GFCI is faulty and must be replaced․ Electrical safety is paramount when operating power tools․
Ryobi Pressure Washer Recall Information (Current as of 12/05/2025)
As of today‚ December 5th‚ 2025‚ Ryobi has issued a significant recall affecting over 700‚000 pressure washer units sold in the United States and Canada․ This recall involves specific models due to a potential hazard․ The U․S․ Consumer Product Safety Commission (CPSC) and Health Canada are actively involved in managing this recall․

The primary concern centers around a component failure that could lead to water leakage‚ posing a risk of electrical shock․ Consumers are strongly urged to immediately stop using recalled pressure washers․ To determine if your unit is affected‚ visit the Ryobi website or contact Ryobi customer service with your model number․
Ryobi is offering a free repair or replacement for eligible units; Registration for the recall is required to receive a remedy․ Detailed instructions and a list of affected models are available on the CPSC website and the official Ryobi recall page․ Prioritize safety and verify your unit’s status․
Repair Resources and Expert Guides
Successfully repairing your Ryobi electric pressure washer often relies on accessing reliable resources․ Numerous online platforms offer expert guides and step-by-step repair assistance tailored to specific Ryobi models․ Several websites specialize in power tool repair‚ providing detailed diagrams and troubleshooting advice․
For visual learners‚ video tutorials on platforms like YouTube demonstrate common repair procedures‚ from replacing the pressure switch to clearing clogged nozzles․ Always prioritize safety when undertaking repairs; disconnect the power supply before disassembling any components․
Ryobi’s official website may also host repair manuals and parts lists for certain models․ If you’re uncomfortable performing repairs yourself‚ consider contacting a qualified small engine repair technician; Having your model number readily available will expedite the diagnostic process and ensure you receive accurate guidance and replacement parts․
Maintaining Your Ryobi Pressure Washer
Regular maintenance is crucial for extending the life and maintaining the performance of your Ryobi electric pressure washer․ After each use‚ thoroughly flush the system with clean water to remove any detergent residue or debris that could cause clogs or corrosion․ Inspect the high-pressure hose for cracks or damage‚ and replace it if necessary․
Periodically check the nozzles for blockages and clean them with a fine wire or nozzle cleaning tool․ Store the pressure washer in a dry‚ frost-free environment to prevent damage from freezing temperatures․ Before long-term storage‚ drain all water from the pump and hose to avoid internal corrosion․
Inspect the GFCI plug and power cord for any signs of wear or damage․ Following these simple maintenance steps will help ensure your Ryobi pressure washer continues to deliver reliable cleaning power for years to come․
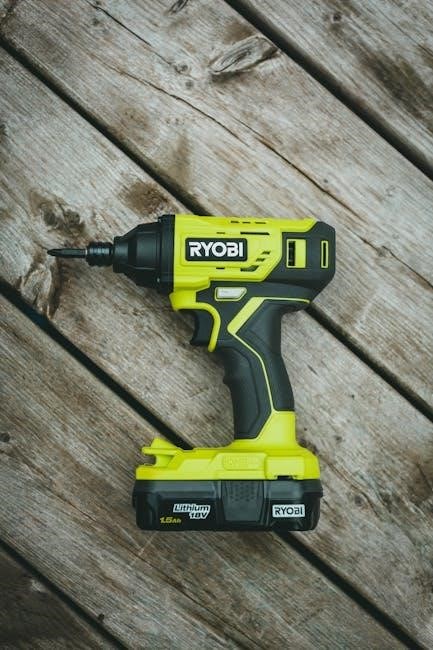
Ryobi as a Brand: Value and Reliability
Ryobi has established itself as a prominent brand‚ particularly appreciated by homeowners and DIY enthusiasts seeking affordable and dependable power tools․ Founded in 1943‚ the company consistently delivers a balance of performance and price‚ making its products accessible to a wide range of users․ This commitment to value doesn’t compromise on build quality‚ as evidenced by the durability of their electric pressure washers․
While often positioned as a “best cheap power tool brand‚” Ryobi’s reliability is consistently praised․ Their pressure washers‚ like other tools in their lineup‚ are designed for frequent use and built to withstand typical household demands․ The brand’s extensive network of service centers and readily available parts further contribute to its long-term value․
Ryobi’s focus on innovation and user-friendly design solidifies its position as a trusted choice for those seeking effective cleaning solutions without breaking the bank․